The majority of operations for this hardware plugin require knowledge of the project structure, and an effort has been made to make project generation
as simple and straightforward ad possible. The description of the project structure can be found
in the Project Structure section.
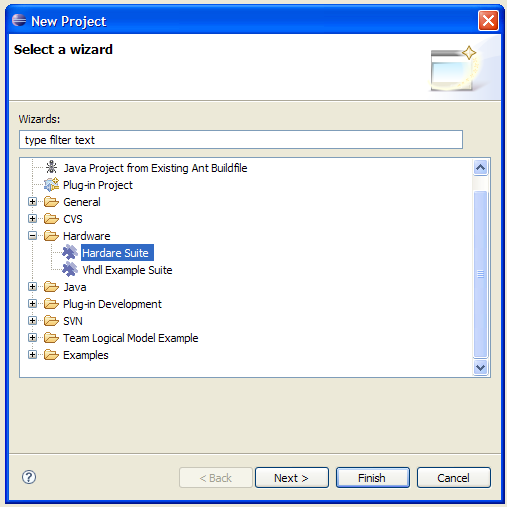
Creating New Project
- Create a New Suite Project which will hold all
of the relevant information for this design. This is handled from the
File->New->Project menu. From this menu select the
Hardware/Suite
-
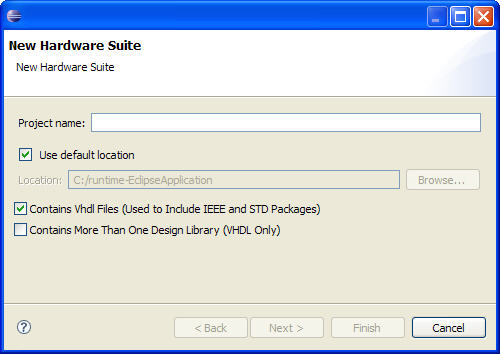
Put the name of your suite into the dialog box, and push finish for a new project or select next to add
existing projects or libraries. At the bottom of the dialog are 2 checkboxes. The top checkbox controls whether
the project contains any standard library packages.
The bottom checkbox controls whether this is a project with only one design library. If the suite contains only
one design project then follow the instructions in Single Design Library Project, otherwise
follow the instructions in Multiple Design Library Project.
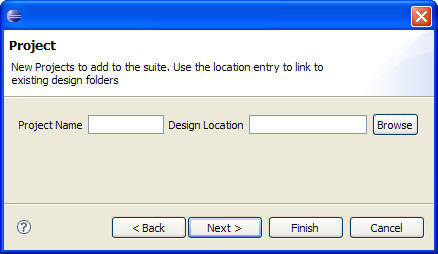
Single Design Library Project
-
Put the name of your project into the dialog box, and then add links to the folders which contain existing
design directories. Select finish and your project is setup.
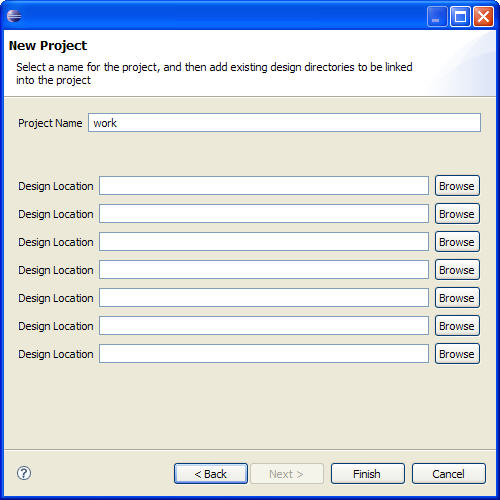
Multiple Design Library Project
To add existing projects, put the name of the project into the project window, and put the location of the
design directory into the location box or browse to open up a file chooser. This will automatically add
the project to the suite and create a link from the current design files to the project design directory.
When finished push next to add existing libraries using the same method as projects or finish to create the project.